Blog

  • Axis Deer Meat: My Honest Take From Pan to Plate

    I’ve cooked a lot of venison. White-tail, muley, even elk once. Axis deer? It surprised me. In a good way. If you want another cook’s candid impressions, check out this thorough axis venison review that walks from pan to plate over on Hats of Meat.

    Here’s the thing. My first bite was in the Texas Hill Country, near Kerrville. My friend Ben grilled a backstrap while we watched fireflies. He sliced it thin and passed a plate. I took one bite and paused. Sweet. Clean. Not gamey at all. You know what? I grinned like a kid.

    How It Tastes (to me)

    • Mild and a little sweet
    • Very lean and tender, if you don’t overcook it
    • Fine grain; it slices neat
    • Less “wild” taste than white-tail

    It feels fancy, but it isn’t fussy. That mix sounds odd. It works.

    What I Actually Cooked

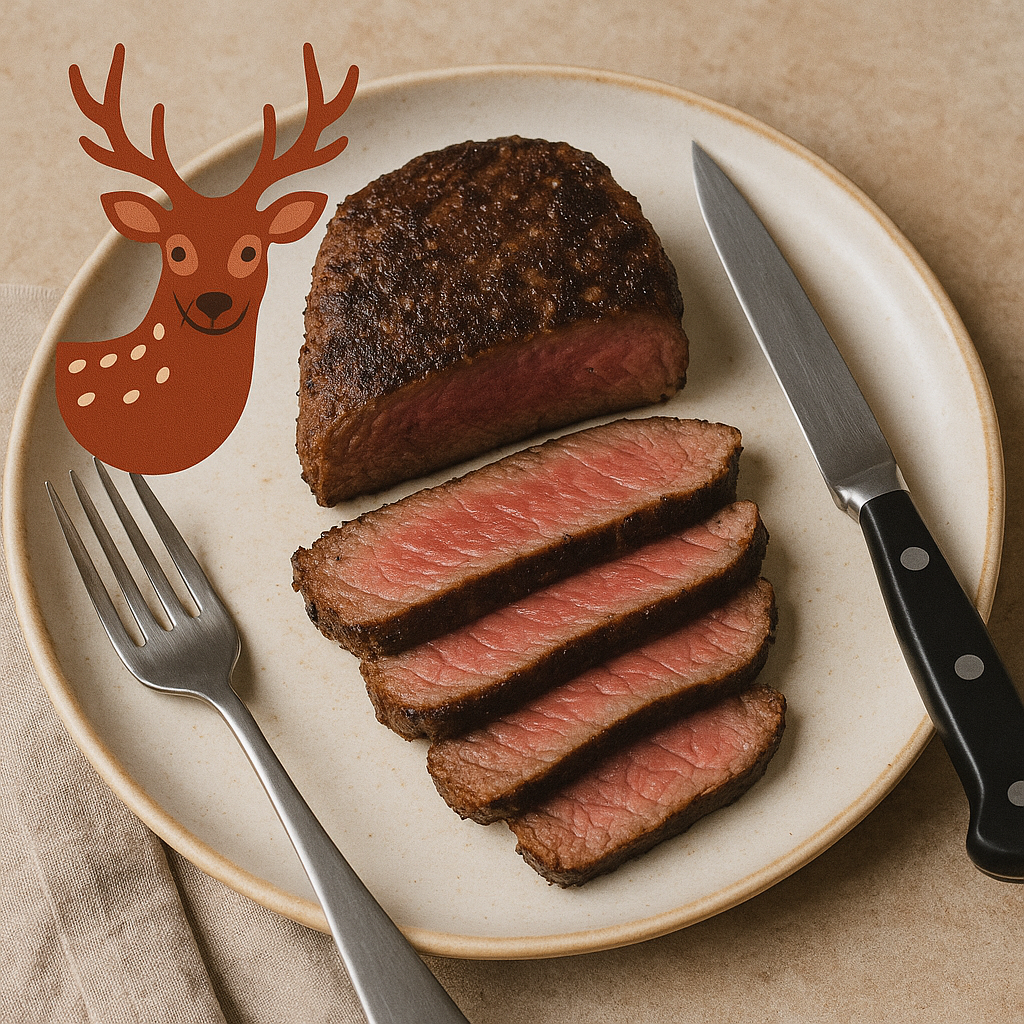
    • Cast-iron backstrap: I patted it dry, salt and pepper only, then hot sear in a Lodge skillet with a little avocado oil. After a minute per side, I added butter, smashed garlic, and a sprig of thyme. I pulled it at 125°F on my Thermapen and let it rest. Sliced across the grain. Melt-in-your-mouth. My son asked for seconds. Then thirds. If you’d like a straightforward walkthrough, this simple guide to cooking axis deer steaks outlines timing, temperatures, and seasoning ideas.

    • Weeknight tacos: I ground axis with a bit of beef fat (about 85/15). No fat? It crumbles and dries. I browned it with onion, cumin, chili powder, and a splash of beef broth. Warm tortillas, lime, cilantro. Simple. Fast. The pan stayed clean because there’s not much grease.

    • Sweet-soy kebabs: Cubes, then a short marinade with soy sauce, brown sugar, lime, ginger, and garlic. Skewers with bell pepper and red onion. Quick grill. Nice char, soft center. My neighbor Sam sprinkled Montreal seasoning, and I hate to admit it, but it slapped.

    • Smoked hindquarter roast: On the Traeger at 225°F till it hit 120°F. Then a hot sear to finish. Rested in foil. Sliced thin for sandwiches with horseradish mayo. Not quite deli beef, but close, and leaner.

    • Shank “osso buco” style: I tied the shanks, browned them, then pressure cooked with tomatoes, carrots, and thyme for 90 minutes. Gelatin-rich and cozy. Great on a cold, wet night. The sauce hugged the noodles.

    • Peppery jerky: Thin slices, quick bath in cracked black pepper, soy, honey, and a touch of apple cider vinegar. Dehydrated till bendy but dry. Road trip fuel. I kept a bag in my YETI for soccer games.

    What I Like Most

    • The clean taste. Folks who “don’t like venison” liked this.
    • It cooks fast, so dinner’s quick.
    • It’s lean, but it still feels rich if you keep it pink.
    • It takes seasoning well—bold or simple.

    What Bugged Me

    • It dries fast. Miss your temp, and it turns chewy.
    • Silver skin is tough; leave it on and you’ll fight your fork.
    • A rutty old buck had a stronger smell. Not bad, but louder.
    • Shipping can scuff the meat. I got a box once with a little freezer burn on two steaks. I trimmed it. Still fine, but not perfect.
    • Ground axis needs fat. No fat means dry burgers that fall apart. Been there.

    Real Sourcing Notes

    I’ve had it three ways:

    • Ranch harvest in Texas, processed at a local shop near Fredericksburg.
    • A box from Maui Nui Venison. Cuts were trimmed well and labeled clear. Price was higher, but the quality was steady.
    • A mixed exotic pack from Broken Arrow Ranch. The axis backstrap from that box was the star.

    Price swings a lot by cut and source. Backstrap and tenderloin cost more, of course. Roasts and trim are kinder on the wallet.

    If you want a straight-shooting breakdown of exotic venison cuts and how to order them, swing by Hats of Meat—their chart saved me a lot of second-guessing.

    Little Tips That Helped

    • Trim the silver skin. All of it. Don’t rush this part.
    • Keep it medium-rare. I pull steaks at 125–130°F and rest.
    • For ground meat, add fat. Beef tallow, pork belly, or bacon ends work. I like 85/15.
    • Short soak in buttermilk can soften a louder cut. Not long, just an hour or two.
    • Slice across the grain. Thin for sandwiches. Thicker for plates.
    • Season simple first. Salt, pepper, garlic. Then try spicy rubs later.
    • Use a thermometer. Guessing is how you dry it out.

    Gear That Earned Its Keep

    • Lodge cast-iron skillet for steady sear
    • Thermapen for quick temp checks
    • Traeger for low-and-slow smoke
    • VacMaster bags to freeze tidy, no ice crust

    You don’t need fancy stuff, though. A hot pan and a watchful eye do the job.

    When It Shines

    • Summer grill nights with corn and a cold drink
    • Cozy fall stews and polenta bowls
    • Meal prep, since it reheats well if you keep it pink
    • Company dinners when you want “wow” but not heavy

    Cooking something this tasty is even better with company. If you still need to find that dinner guest, you can always swing by SPdate — a no-stress dating platform that matches you with nearby food-curious singles who might just bring the wine.
    If you’re closer to East Texas and craving fresh conversation to go with your axis tacos, the local classifieds scene is hopping—scroll the Backpage Nacogdoches personals to connect with last-minute plus-ones, cooking buddies, or fellow wild-game enthusiasts who appreciate a home-cooked meal as much as you do.

    Who Should Try It

    • Beef lovers who want lean but tender
    • Folks who say they hate “gamey” meat
    • Hunters who like clean flavor and fast cooking
    • Busy parents (hi, it’s me) who need dinner in 15 minutes

    A Small Thing I Learned the Hard Way

    I once cooked axis burgers like beef. No added fat. No binder. They crumbled and dried out. Everyone still ate, because bun, sauce, and a joke can save a meal, but I learned. Next time I mixed in pork belly and a pinch of cold water. Perfect sear. Juicy center. Happy table.

    Final Take

    Axis deer meat feels special, but it’s easy to cook. It’s mild, lean, and kind of sweet. Treat it gentle, trim it clean, and pull it early. If you want wild flavor without the funk, this hits the mark.

    Would I buy it again? Yep. I already did. And I’ve got two backstrap steaks thawing for Friday. Salt, pepper, garlic, butter. Simple. Can’t wait.

  • I Lived With a Dry Ager Meat Fridge for a Year: Here’s What Happened

    I’m Kayla, and yes, I actually bought a dry ager meat fridge. It sits by the garage door, near the mop and the dog bowls. My kids call it “the meat museum.” Cute, right? It makes me laugh, but also, they’re not wrong.

    Was it worth it? Mostly, yes. But not without a few weird moments.

    Why I Bought It

    I love steak. I cook a lot. Weeknights are fast and simple, but weekends? That’s when I play. I wanted that rich steakhouse taste at home. I kept hearing about dry aging—deep beef flavor, nutty, buttery, a touch of blue cheese. So, I went for it and got a DRY AGER-style meat fridge. Glass door. Tight control on temp and humidity. A charcoal filter. Low, steady fan. It looks like a fancy wine fridge, but with beef.

    Setup Took 20 Minutes, Then I Got Nervous

    I plugged it in, set the temp to 1.5°C (about 35°F), and set humidity to 82%. The unit stabilized fast. I wiped it down, slid in a salt block, and then stood there like a goalie, just watching. I was excited. Also scared. Meat isn’t cheap. For the blow-by-blow of how that first year unfolded, you can check out my detailed journal in I Lived With a Dry Ager Meat Fridge for a Year. During that initial setup, I cross-checked my numbers with the temperature chart in Dry Aging Beef at Home: A Thermal How-To | ThermoWorks, and it matched almost exactly.

    My First Ribeye: 45 Days of Waiting

    I started with a bone-in ribeye roast—about 12 pounds. I trimmed the fat cap a bit, but not much. Less handling is better.

    • Day 7: The surface looked dry and darker. No smell. Good sign.
    • Day 14: A firm crust started to form. I noticed a mild, clean funk—like a tiny hint of blue cheese.
    • Day 30: The meat felt tight. Color was deep red inside. The crust looked almost bark-like.
    • Day 45: Time to pull.

    I trimmed the dry crust and saved the fat for the skillet. Loss was around 18%. Normal. I cut steaks two inches thick. The sear was wild. The smell filled the kitchen in a good way—not loud, just… savory. First bite? Sweet, beefy, nutty. My husband blinked like, “Wait.” I nodded, like, “Yep.”

    What Actually Works

    • Flavor: Real change after 30 days. Big change around 45. Past 60, it gets funkier.
    • Texture: Softer chew, but not mushy. Juices stay on the plate less.
    • Consistency: Ribs and strip loins age the best for me. Tenderloin? Meh. Too lean.
    • Smell: The fridge itself doesn’t stink when it’s clean. The meat has a clean, cheesy note when you open the door, then it fades.

    What Bugged Me

    • Noise: It hums like a normal fridge. Not loud, but you’ll hear it in a small space.
    • Space: It holds one big primal or two small ones. When friends ask for “just one steak,” I have to plan ahead.
    • Loss: Trim loss and moisture loss add up. Your 12 pounds might turn into 8. That’s the trade.
    • Waiting: It’s a patience game. If you hate waiting, this will drive you nuts.

    Cost Stuff People Don’t Say Out Loud

    • Meat: I buy whole primals from a trusted butcher. Good source matters. You want clean, fresh, and well-aged to start.
    • Power: My energy app shows about 35 kWh a month. Not crazy.
    • Trimming: You’ll throw away the crust, but the fat trimmings are gold for searing potatoes.

    Another cost-cutting trick is checking local classified boards when restaurants upgrade or close—lightly used vacuum sealers, meat slicers, or even entire dry-aging cabinets show up there for a song. Southern California readers can browse this Huntington Park Backpage directory to spot deals on equipment and sometimes even connect with neighborhood butchers, shaving serious dollars off the upfront investment.

    If you want a deeper dive into selecting quality primals and gear, my favorite resource is the straight-shooting guide at Hats of Meat.

    Cleaning and Safety (The Unsexy Part)

    I set a reminder every Sunday. Door gasket wipe. Drip tray check. Quick wipe with a mild vinegar and water mix. The built-in light cycle and charcoal filter help, but you still need to clean. I also let the UVC cycle run when the fridge is empty, especially between batches. White mold? Normal. Green or fuzzy? Pull the meat, clean, and reset. I had one fuzzy patch once at day 10. I cleaned, patted dry, and it was fine. If you’re ever worried about safety, it helps to know that the European Food Safety Authority has found that aged meat can be just as safe as fresh when best practices are followed—EFSA: Aged Meat as Safe as Fresh Meat, When Done Correctly.

    A Few Real Batches I Ran

    • 45-Day Ribeye: Huge hit. Best balance of funk and sweet fat.
    • 30-Day Strip Loin: Crowd-pleaser. I used it for a summer cookout. Salt and pepper only.
    • 60-Day Strip: More funky. My brother loved it. My neighbor thought it was “too blue-cheesy.”
    • 35-Day Pork Loin: It worked, but the flavor was mild. Fun once, not my go-to.
    • 90-Day Ribeye: Intense. I liked it sliced thin with a splash of brown butter and lemon. Not for everyone.

    I’m also tempted to branch out beyond beef—venison, maybe even exotic game. My friend keeps raving about axis deer, and after reading this honest take on cooking axis deer meat, I’m convinced it deserves a future spot in the meat museum.

    Little Things I Learned

    • Don’t crowd the chamber. Air needs space to move.
    • Leave a small fat cap on. It protects the meat.
    • Don’t fuss with it. Open the door less.
    • Keep notes. Days, cuts, weights. It helps a lot.
    • Rest steaks after trimming and cutting. Even an hour in the fridge helps.
    • A ripping hot cast iron pan beats a grill for the sear. I finish with a knob of butter and a clove of smashed garlic. Simple and bold.

    Something I didn’t expect: once the steaks are trimmed and seared, they photograph ridiculously well—so well that my group chat basically demanded nightly “food nudes.” If you’ve ever wondered why Snapchat is the go-to platform for sending any kind of quick, private photo, from ribeyes to risqué shots, check out this Snapchat nudes guide to learn how the app’s disappearing-image feature became a cultural phenomenon and how to share safely without leaving a digital trail.

    What Went Wrong (And How I Fixed It)

    I tried aging a small roast that was already cut down. Bad move. Too much surface, not enough mass. It dried too fast and tasted flat. I also tried 70 days on a cheaper cut. The flavor felt muddy, not deep. Lesson: start with good beef, and keep it whole.

    Another time, I got cocky and opened the door every other day to “check.” The crust didn’t set right. Now I peek through the glass and leave it alone.

    Who Should Think About This

    • Home cooks who love steak and love a project.
    • Folks who host a lot—birthdays, game days, big grilled meals.
    • People who don’t mind logs, cleaning, and planning ahead.

    Who should skip it? If you want fast meals, or you hate trimming. Or if you don’t have a spot for it where it can sit level and stay cool.

    Final Take

    I’m glad I bought it. I use it about five times a year, mainly spring through fall when we grill more. A 45-day ribeye roast still makes me smile. It’s a fun mix of science and craft—like baking bread, but with beef and a little swagger.

    Is it a luxury? Yes. Is it only for chefs? No. If you’ve got the space, the patience, and a good butcher, a dry ager meat fridge can be a quiet star in your kitchen. Or your garage. Mine sure is.

    You know what? The next batch is a 40-day strip for New Year’s. I’ve already named it. That’s how you know I’m hooked.

  • I Cooked Moose Meat for a Week: Here’s What Happened

    How it showed up on my counter

    A friend from Alaska sent me a big cooler. It was packed with butcher paper and ice packs. When I opened it, my dog went wild. The labels were simple: backstrap, shank, roast, ground. It felt like a winter gift. Also, a small headache. Moose is not beef. It asks for care.
    I actually kept a detailed daily log of the experiment, and you can read the full play-by-play in this piece: I cooked moose meat for a week—here’s what happened.

    I’ve cooked venison, elk, and bison before. Moose sits somewhere near elk. Leaner than beef. Darker than bison. Rich, but not loud.
    Moose meat is notably lean, containing approximately 0.74 grams of fat and 22.24 grams of protein per 100 grams, making it a high-protein, low-fat option compared to traditional meats like beef or pork. (fatsecret.com)
    For a different—but equally lean—reference point, my candid notes on axis deer meat, from pan to plate can help put the flavor in context.

    First try: simple backstrap steak

    I started easy. Backstrap, trimmed clean. I took off the tough silverskin with a sharp boning knife. Salt. Pepper. A light oil rub.

    Cast iron, ripping hot. I seared both sides, about 90 seconds each. I used my thermometer and pulled at 130°F. Rested five minutes. Sliced across the grain.

    Taste? Clean and meaty. Not “gamey,” more iron-rich. Think beef, but calmer. My kid added ketchup, which hurt my soul a bit, but you know what? He finished his plate. I ate mine with buttered green beans and a few blueberries on the side. That berry pop works with moose. It surprised me.

    Slow comfort: stew night

    Next, a stew. I cubed a roast and browned it in my Dutch oven. Onions, carrots, celery, garlic. A splash of red wine. Beef stock. A few juniper berries and thyme. Low and slow, about three hours, till the cubes gave in.

    The house smelled like fall in Maine. The meat turned tender and silky. The broth got deep and brown. Even better the next day. I took a thermos to my kid’s hockey practice. It kept me warm on the bleachers.

    Burger fix: add a little fat

    Ground moose is very lean. If you cook it like beef, it can run dry. I mixed it 80/20 with pork fat from my butcher. A teaspoon of Worcestershire, a pinch of onion powder, salt, and black pepper.

    Cast iron again. I did smash burgers. Quick sear. American cheese. Toasted buns. I spread a little mayo to help with the dryness. It worked. Next time, I’ll mix in a tablespoon of cold butter too. Small trick. Big help.

    The surprise hit: shank “osso buco”

    Shanks look rough. Lots of sinew. Don’t fear them. I browned the pieces, then braised with tomatoes, garlic, and a bay leaf. Three and a half hours at 300°F. The collagen melted. The sauce got glossy and sticky, in a good way. Spoon-tender meat. I served it over creamy polenta. My husband called it “restaurant good.” I saved the bone marrow for toast. Salty. Rich. A little wild.

    Jerky for hikes

    I sliced semi-frozen backstrap thin. Marinade: soy sauce, brown sugar, black pepper, garlic, and a touch of liquid smoke. Dehydrator at 160°F till firm but bendy. It made clean, high-protein snacks. Not too sweet. Great in the car or on a short trail. My only gripe? It goes fast. Everyone raids the jar.

    Flavor, texture, and little quirks

    • Color: deep red, almost burgundy.
    • Taste: beef-adjacent, but with a clean, iron note.
    • Texture: lean and tight grain. Tender if you don’t overcook.
    • Smell while cooking: savory, a bit woodsy. My kitchen felt like a cabin.

    It can turn dry if you blink. That’s the quirk. But once you learn the rhythm, it’s steady and kind.

    What bugged me a bit

    • Trimming takes time. Silverskin is stubborn.
    • Overcooking punishes you fast.
    • Access is limited. I’m lucky to know a hunter.
    • A few cuts had a little “bloodshot” edge from the shot. I trimmed it away.

    Minor stuff. But it’s real.

    What I loved

    • Lean, high protein meals.
    • Added vitamin boost: Additionally, moose meat is an excellent source of B vitamins, such as niacin and riboflavin, which are essential for energy metabolism and maintaining healthy skin, hair, nerves, and muscles. (hss.gov.nt.ca)
    • Big flavor without heaviness.
    • Braises turn downright cozy.
    • Pairs well with berries, mushrooms, and potatoes.
    • Feels like a place. Like spruce and cold air, even if you’re just home on a Tuesday.

    Since I’m already thinking about how simple lifestyle choices—from lean wild meat to daily habits—might influence energy and hormones, I got curious about the buzz around cold-water therapy. A clear, research-heavy breakdown lives here: do cold showers increase testosterone? The article sifts through the studies and myths so you can decide whether a chilly rinse deserves space in your own health routine.

    Little tips I wish I knew day one

    • Trim every bit of silverskin you can. It won’t melt.
    • For steaks, aim for medium-rare. I pull at 125–135°F.
    • Rest your meat five minutes. It matters.
    • Use a thermometer. Guessing isn’t heroic.
    • Ground moose likes fat. Add pork or beef fat, about 20%.
    • For braises, low and slow wins. Think 300°F for hours.
    • Wrap tight for the freezer. Double paper, then plastic. Label dates.
      And if you’ve ever wondered whether dry-aging game is worth the fridge space, check out what happened when I lived with a dry-ager meat fridge for a year.
    • Don’t drown it in vinegar marinades. It can go mushy.

    Safety note: I cook whole cuts medium-rare, but I take ground moose to 160°F. I also keep my boards and knives clean between steps.

    Cost and getting it

    You won’t see true wild moose meat at a normal U.S. store. Friends, family, or a hunt are the usual routes.

    If you’re striking out with personal connections, regional online swap boards can be gold mines; Midwestern readers might check the community listings on Backpage Marion where locals sometimes advertise portions of legally harvested game, saving you the legwork of finding a direct hunter and letting you sample a cut or two before investing in bulk.

    I paid my friend in jerky, spice rubs, and a small care package of coffee and maple candy. Fair trade, if you ask me.

    If you hunt, the price per pound gets weird. Tags, gas, time, and processing make it feel like a project more than a bargain. But the yield from one moose is huge. Freezers will smile.

    For deeper dives into wild-game sourcing, storage, and recipe ideas, take a peek at HatsofMeat.

    Who should try it?

    • If you like venison or elk, you’ll be happy.
    • If you love stews, braises, and cast iron nights, it fits.
    • If you only eat chicken and want no “red meat taste,” this may not be your lane.

    My keepers and flops

    Keepers:

    • Shank braise with tomatoes and bay leaf.
    • Backstrap steaks, simple salt and pepper.
    • Smash burgers with added fat and mayo.

    Flop:

    • A quick stir-fry. It dried out fast and turned chewy. Next time I’ll slice thinner and marinate shorter.

    Final take

    Moose meat felt like a small adventure. It tasted honest. It asked me to slow down and pay attention. I’d cook it again in a heartbeat, especially when it’s cold outside and I want a pot bubbling on the stove. If you get the chance, try the shank first. Then a backstrap steak. Keep your pan hot, your knife sharp, and your rest time sacred. Funny how those small things make a big meal.

  • Corned Beef Smoked Meat: My Take, My Taste

    Note: This is a creative, first-person story review written like a personal tasting journal.

    Quick game plan

    • What I tried, where I got it
    • Taste and texture, the real talk
    • What made me happy, what bugged me
    • How I cooked and served it
    • Tips I wish I knew sooner
    • Buy it, smoke it, or skip it?

    First, what I actually ate

    I tried three kinds, on different weekends, because I’m a little food-nerdy like that. I also put together a deeper write-up on the full tasting adventure in my longer corned beef smoked meat journal if you’re hungry for even more details.

    • Store deli: Boar’s Head corned beef, sliced thick at the counter. I grabbed a pound, took it home, and warmed it in a steam bath on the stove. Simple. Low stress.
    • Classic shop: A fat, steamy pile at Katz’s Deli in New York. I asked for extra fatty slices. The counter guy winked. Good sign. I also had a plate of Montreal smoked meat at Schwartz’s. Different city, different vibe. Same big grin.
    • Backyard smoke: A Costco corned beef brisket flat, rinsed, patted dry, rubbed heavy with black pepper, coriander, and garlic. I smoked it on a Traeger Pro at 225°F with cherry and a touch of oak. I wrapped it in butcher paper at 165°F, pulled it at 195°F when it felt soft, then steamed it for 45 minutes. My kitchen smelled like a deli truck parked in a forest. In a good way.

    For a comprehensive understanding of Montreal's iconic smoked meat and its preparation, you might find this article insightful.

    Flavor check: Salt, smoke, and a little magic

    Let me explain. Corned beef is salty. That’s the point. When it’s right, the salt wakes up the beef, and the smoke adds a campfire hug. The spice crust—pepper and coriander mostly—cracks a bit, so every bite pops.

    • Katz’s: The fat melted. The pepper hit first. Then a warm garlic note. I didn’t talk for a minute. I just ate.
    • Schwartz’s: A bit leaner, more spice-forward, and softer around the edges. The rye bread had serious chew. The mustard was sharp, like a quick joke.
    • Home smoke: My bark was solid. Thick, peppery, and a little sweet from cherry wood. The smoke ring looked pretty, but the feel mattered more. Slices bent, then broke clean. That’s the sweet spot.

    Texture: Fork tender, not mushy

    Here’s the thing. You want it to slice thin across the grain and still hold shape. Steam helps. Slice too early, and it shreds. Wait a beat, and it’s smooth and juicy.

    • Deli slices: Easy to chew. Great for tall sandwiches.
    • My batch: The flat was a hair drier at the edges. Next time I’ll pick a point cut or marbled flat. Fat is flavor, and it’s also insurance.

    What I loved

    • Big comfort vibes. Smells like Sunday and old diners.
    • The spice crust. Pepper, coriander, garlic, a whisper of mustard seed.
    • It’s a sandwich machine. Rye, mustard, pickles, done.
    • Leftovers play nice. Hash with eggs. Sliders for game day. Even a cheesy melt.

    What bugged me a bit

    • Salt creep. Some bites ran salty, especially near the ends. A quick soak in water before smoking would’ve fixed that.
    • Time tax. My backyard batch took all day—smoke, wrap, steam, rest. Worth it, but plan ahead.
    • Price swings. Deli sandwiches aren’t cheap. And brisket isn’t either.

    How I served it (and what actually worked)

    • Sandwich: Marble rye, deli mustard, two slices of Swiss, a warm pile of meat, and a crunchy pickle on the side. I pressed the bread on a cast iron pan for 30 seconds per side. Light toast. Big flavor.
    • Hash: Cubed meat, diced potatoes, onion, a hit of paprika, and a fried egg. The edges got crispy. I maybe did a little happy dance.
    • Bonus bowl: Warm broth, noodles, thin slices of smoked corned beef, green onion, and a splash of soy. It felt cozy on a cold night.

    Tiny tips I wish I learned sooner

    • Rinse and soak store-bought corned beef for 30–60 minutes if you plan to smoke it. It tames the salt.
    • Pat it dry and let it sit in the fridge, uncovered, for a few hours. The surface gets tacky. Smoke sticks better.
    • Go low and slow around 225°F. Wrap when the bark looks set and the meat hits about 165°F.
    • Steam to finish. It brings back moisture and makes slicing smoother.
    • Slice across the grain. Always. Thinner for sandwiches, thicker for plates.
    • Wood: Cherry plus oak felt balanced. Hickory ran a bit strong for me here.
    • Gear that helped: A basic probe thermometer (ThermoWorks pocket style), butcher paper, a mild deli mustard.
    • Curious about at-home aging? I spent a year with a dedicated dry-ager and shared everything I learned in this deep dive.

    For more nerd-level notes and side-by-side slice photos, swing by HatsofMeat.com—it’s basically a rabbit hole for brisket brains like us.

    Pastrami vs Montreal smoked meat vs “just corned beef”

    • Pastrami: Heavy pepper and coriander, smoked, then steamed. Bushy bark. Big spice.
    • Montreal smoked meat: Similar path, but the spice leans a touch different, and the slices can feel looser and silkier.
    • Plain corned beef: Brined beef, often boiled or braised, not smoked. Softer, milder, still great.

    They’re cousins. You can taste the family link.

    Who should buy it?

    • Deli fans who want bold flavor and easy meals.
    • Home cooks who like weekend projects and don’t mind smelling like smoke for a bit.
    • Sandwich people. If you love rye and mustard, this is your lane.
    • Adventurous eaters who get a thrill out of trying wilder proteins (I once dedicated a whole week to moose and wrote about it right here).

    If you’re wishing you had a fellow sandwich fiend to split that mile-high pastrami on rye with, swing by localsex.me—you can connect with nearby food lovers ready to join you on spontaneous deli runs (and maybe spark a little extra chemistry along the way).

    On the other hand, if your meat pilgrimage ever steers you toward the Canadian border and the neon roar of the falls, check out the Backpage Niagara Falls board—it’s a quick, no-frills classifieds hub where locals drop meet-up invites, late-night deli tips, and insider guides that can turn a solo sandwich mission into a full-blown food adventure.

    My verdict

    • Katz’s plate: 9.5/10. Big flavor, perfect fat, happy silence at the table.
    • Schwartz’s plate: 9/10. Spice-forward and clean. Great bite.
    • My backyard batch (first try): 8/10. Tasty bark, solid smoke, a little salty at the edges. Next run will be even better.

    Additionally, for a detailed review of Schwartz's Deli, including its history and offerings, consider reading this deep dive.

    You know what? Corned beef smoked meat feels like a hug you can chew. It’s bold, a little messy, and proud of it. If you like food with stories, this one tells a good one.

    Quick FAQ, real quick

    • Too salty? Soak before smoking and finish with steam. Also, use a gentler mustard.
    • Too dry? Wrap sooner, steam longer, and pick a cut with more marbling.
    • Leftovers? Keep in the fridge, wrapped tight. Steam to reheat, not the microwave.

    Now I’m craving another sandwich. With extra mustard. And a pickle that bites back.

  • What I Actually Pay For Buffalo Meat (And When It’s Worth It)

    I’m Kayla, and I cook buffalo at home a lot. I buy it from stores, from ranch sites, and once from a rancher who dropped a quarter animal at my butcher. Folks ask me, “Isn’t it too pricey?” Well, yes and no. It depends on the cut, the store, and the season. Let me explain.

    By the way, most “buffalo” in stores here is bison. Same thing for cooking and cost talk, so I’ll just say buffalo.

    Where I buy and what I paid

    Here’s what I’ve paid lately, with real receipts from my kitchen drawer.

    If you’re curious how these numbers stack up nationwide, a quick spin through Hats of Meat shows real-time price snapshots that help me decide when to pounce and when to wait.

    For an even deeper dive (I posted every receipt and my running spreadsheet), check out my full breakdown on Hats of Meat: What I Actually Pay For Buffalo Meat (And When It’s Worth It).

    • Costco (Great Range brand, Denver): Ground buffalo 90% lean at $9.99 per lb, sold in a 2.5 lb pack. I’ve seen it go up to $10.99.
    • Whole Foods (Cherry Creek): Ground at $11.99 per lb; sirloin steaks around $22–$24 per lb; ribeye around $34–$39 per lb.
    • King Soopers/Kroger: Ground buffalo (Great Range) at $10.49 per lb on sale; regular was $11.49.
    • Local butcher (Wheat Ridge): Stew meat at $14.99 per lb; marrow bones $4.50 per lb; liver $9.99 per lb. The owner calls me by name now. Kind of sweet.
    • Wild Idea Buffalo (online): Ground at $12–$14 per lb; ribeye $39–$45 per lb; flat rate ship was $28 to me with dry ice, free ship promo over a bigger order.
    • Northstar Bison (online): Sirloin $20–$26 per lb depending on grade; short ribs $13–$16 per lb; ship was $25 to me last time.
    • Farmers market (summer): Steaks a bit higher—think $2–$4 per lb more—but the rancher threw in soup bones and a recipe card. I made bone broth that weekend and felt very proud.

    You know what? Prices jump around. Holidays bring deals on roasts. Summer brings burger sales. When I see ground under $10 per pound, I grab two packs and freeze one.

    Cut by cut: what it costs me

    Buffalo is lean, so I pick cuts with care. Here’s my real-world range.

    • Ground: $9.99–$12.99 per lb (store), $12–$14 online.
    • Sirloin steak: $20–$26 per lb.
    • Ribeye/NY strip: $32–$45 per lb.
    • Chuck roast: $12–$18 per lb (great in the slow cooker).
    • Stew meat: $13–$16 per lb.
    • Short ribs: $13–$17 per lb.
    • Liver/heart: $8–$12 per lb (cheap, nutrient-loaded).
    • Marrow/soup bones: $3–$6 per lb.
    • Jerky: $1.50–$3 per ounce. Pricey snack, but it saves me in long soccer games.

    If a store only sells fresh, I ask for frozen stock in back. It’s often cheaper. Not always, but often.

    The “bulk buy” story that saved me money (but ate my freezer)

    Last fall I split a quarter bison from a Wyoming ranch with a friend. Hanging weight price was $10.50 per lb, plus processing. After trim and wrap, my take-home cost worked out to about $16 per lb across all cuts. That gave me roasts, steaks, ground, ribs, organs—the whole line.

    Was it cheap? Not exactly. But I got ribeyes that would be $40 per lb a la carte, for that same blended price. The catch: you need freezer space and patience. Also, I had to learn not to overcook lean steaks. A quick sear, a rest, and butter. That’s the move.

    How buffalo stacks up against beef in my cart

    • Ground beef (grass-fed at my stores): $6–$9 per lb.
    • Ground buffalo: $10–$13 per lb.

    So buffalo is usually $3–$4 more per pound for ground. Steaks are a jump too. I still buy it because I like the clean taste and it sits light after dinner. Less greasy. My kids notice, weirdly enough. On taco night, there’s less orange fat in the pan, and my son calls it “the neat meat.” I didn’t teach him that. He just said it. Beyond taste, bison meat is a nutrient-dense food, offering a rich source of protein, iron, zinc, and B vitamins, while being lower in fat and calories compared to beef.

    If you’re curious how other wild game stacks up, I spent a week cooking nothing but moose and detailed the flavors, costs, and kitchen surprises here: I Cooked Moose Meat For A Week—Here’s What Happened.

    Hidden costs I learned to expect

    • Shipping: $20–$35 on most online orders, unless you hit a free-ship promo.
    • Minimum order: Some sites make you build a bigger box. I plan a month of meals and fill it out with bones and ground to make it worth it.
    • Waste: Overcook a steak and you’ll feel the pain in your wallet. I use a probe thermometer now. Pull at 125–130°F for medium-rare, rest, then slice. No shame in tools.

    My budget playbook (simple, but it works)

    • Buy ground in bulk when it hits $9.99–$10.49 per lb. Freeze flat in 1 lb bags for fast thaw.
    • Pick sirloin instead of ribeye. It eats well if you marinate with olive oil, garlic, and a splash of soy.
    • Use stew meat and chuck for big weekend pots. Chili, barbacoa, or French dip style. Monday lunches feel fancy.
    • Mix 50/50 with mushrooms for burgers. Tasty, tender, cheaper.
    • Watch email lists from Wild Idea and Northstar. Free ship codes pop up around holidays.
    • Ask your butcher about “manager’s specials.” I scored short ribs at $11.99 per lb once. I still talk about that dinner.

    Speaking of using tech to snag deals and make life easier, plenty of people also rely on location-based apps for their social life as much as their grocery list. If that side of adulting interests you, take a peek at this roundup of free local sex apps—it breaks down which platforms have the most active nearby users, the best safety features, and zero sign-up fees, so you can decide quickly if any of them fit your vibe. And if you happen to be on England’s southwest coast and prefer a classifieds-style board over an app, the detailed Backpage Plymouth guide lays out the latest local listings, verification steps, and user-reviewed hotspots so you can connect confidently without endless scrolling.

    Real meals I made and what they cost me

    • Game Day Chili: 2 lbs ground buffalo from Costco ($20), beans, tomatoes, spices ($8). Feeds 6–8. About $3–$4 per bowl with toppings.
    • Weeknight Steak Salad: 1 lb sirloin from Whole Foods ($22), spring mix, blue cheese, walnuts ($6). Dinner for two. About $14 per plate. Felt like a bistro.
    • Slow Cooker French Dip: 3 lb chuck roast from the butcher ($45), onions, broth, hoagies ($8). Makes 6 big sandwiches. About $8–$9 each, and better than takeout.

    Honestly, that chili wins on value. It stretches.

    Is buffalo worth the cost?

    For me, yes—when I plan. The flavor is rich but clean. It’s lean, so it cooks fast. And I feel good after eating it. That feeling isn’t just in my head; buffalo’s conjugated linoleic acid (CLA) content has been associated with potential health benefits, including anti-inflammatory properties. If money is tight that week, I stick to ground, stew, and bones for broth. If I’ve got room to splurge, I’ll get a ribeye and make a date-night plate with roasted carrots and a tiny pat of garlic butter. Simple, happy.

    If lean, clean-tasting red meat is totally your thing, you might like my honest taste test of another mild, grass-fed game—Axis Deer Meat: My Honest Take From Pan To Plate.

    Quick answers I wish someone told me

    • Cheapest way to start? Ground from Costco or Kroger
  • I Tested a Bunch of Meats for Jerky. Here’s What Actually Chews Right.

    Hey, I’m Kayla. I make jerky like other folks make coffee. A lot. I’ve run beef, turkey, venison, even salmon through my kitchen. Some cuts sing. Some turn tough or greasy or sad. You know what? The meat matters more than the marinade. If you want my full blow-by-blow lab notes on every strip I tried, you can skim the longer piece where I tested a bunch of meats for jerky and ranked what actually chews right.


    Quick map of where we’re going

    • My setup and slice style
    • Best beef cuts (with notes)
    • Non-beef winners (and losers)
    • Real marinades and times
    • Simple tips that saved me from jaw pain
    • My final pick

    My setup (nothing fancy, but it works)

    • Gear: Nesco Snackmaster dehydrator and my oven on low. I also tried my Traeger on “smoke” for a few runs.
    • Knife: Victorinox boning knife. Thin blade. Stays sharp. Helps a lot.
    • Slice: I freeze the meat for 45–60 minutes. Then I slice 1/8–1/4 inch. Against the grain for tender bite. With the grain when I want more chew.

    I know that sounds fussy. It’s not. That little freeze makes the cuts clean and even. Less ragged, less stringy.


    Best beef cuts I’ve used (ranked, with real batch notes)

    1) Eye of Round — my steady winner

    • Why: Lean, easy to slice, dries fast, great snap. Not crumbly.
      If you're curious why this particular roast shines, jerky pros swear by eye of round for its uniform leanness.
    • Where I buy: Costco whole roast or the packets at Sam’s Club.
    • Pro sourcing deep dive: The cut-comparison tables over at HatsofMeat helped me nail down the best price-per-pound sweet spots.
    • Batch note: In June, I made 3 pounds, sliced 1/8 inch, marinated overnight, dried at 160°F for 4.5 hours in the Nesco. Pepper crust, clean chew. Kids liked it. My jaw didn’t hate me.

    2) Top Round (London Broil) — close second

    • Why: Also lean, a touch more grain. A little more chew than eye of round.
      Some commercial makers lean on top round a.k.a. London broil for consistent results, so it's no surprise it ranks high in my kitchen too.
    • Batch note: September tailgate, 4 pounds in a soy-Worcestershire mix, smoker for 2 hours, then oven finish. Big beef flavor, took seasoning well.

    3) Sirloin Tip — tasty but watch the slice

    • Why: Beefy and a bit tender. Can get stringy if you slice with the grain by mistake.
    • Batch note: I used a teriyaki-ginger run. At 5 hours it stayed bendy, not brittle. Good road trip snack.

    4) Bottom Round — fine, but dries a bit uneven

    • Why: Still lean, but the muscle fibers can get stiff.
    • Batch note: I had to rotate trays more to keep edges from getting too dry. Flavor was good with extra black pepper.

    5) Flank Steak — pricey, fierce grain

    • Why: Strong beef taste, but the long fibers fight back.
    • Batch note: Sliced very thin across the grain helped. Still chewier than my top picks.

    Brisket — sounds fun, turns greasy

    • Why: Fat equals flavor in BBQ. Fat equals sad jerky. It went soft in the bag after a day.
    • Batch note: First bite was great, smoky and rich. Day two? Grease dots and a weird film on my fingers. I tossed half. Lesson learned.

    Non-beef I’ve tried (hits and misses)

    Venison (backstrap or round) — lean and lovely

    • Why: Clean, wild flavor. Takes pepper and garlic well.
    • Batch note: My brother brought a deer last fall. I made 2 pounds with a simple salt-pepper-garlic rub. Dehydrator at 160°F for 4 hours. Perfect trail snack.
    • If you ever score some exotic venison like axis deer, my honest take on cooking and eating it is worth a peek—different animal, similar lean magic.

    Bison round — light, beef-like, but dries fast

    Turkey breast — great for a lower-fat snack

    • Why: Mild, takes sweet heat well.
    • Safety note: I bring strips up to 165°F first in the oven for a bit, then dry. Texture turns firm and jerky-like, not chalky, if you keep slices thin.
    • Batch note: Honey-chipotle worked. Kids kept sneaking pieces.

    Pork loin — okay, but flavor sits on the surface

    • Why: Lean enough, but the texture stays a touch soft and ham-like.
    • Batch note: Needed extra salt and smoke. It was fine, not thrilling.

    Salmon — tasty but fragile

    • Why: Rich and silky. Breaks easy and spoils faster.
    • Batch note: I used a maple-soy cure. Good for a weekend trip, not for the glove box.

    In the same wild-game lane, I spent a full week cooking moose in every form imaginable—jerky included—and wrote up the highs, lows, and the mild shock that it tastes less “gamey” than expected in this moose-meat deep dive.


    Real marinades that worked for me

    I keep it simple. Salt for cure, a little sugar for balance, and bold spice.

    • Classic black pepper beef (3 lb beef)

      • 1/2 cup low-sodium soy sauce
      • 1/4 cup Worcestershire
      • 2 tbsp brown sugar
      • 2 tsp cracked black pepper (plus more on top)
      • 1 tsp garlic powder
      • Optional: 1/2 tsp liquid smoke if I’m not using the smoker
      • Time: 8–12 hours in the fridge in a zip bag. Pat dry before drying.
    • Sweet heat turkey (2 lb turkey breast)

      • 1/3 cup soy sauce
      • 2 tbsp honey
      • 1 tsp chipotle powder
      • 1 tsp onion powder
      • Pinch of cayenne
      • Time: 6–8 hours. Thin slices help.
    • Venison simple salt and pepper (2 lb)

      • 1 tbsp kosher salt
      • 2 tsp black pepper
      • 1 tsp smoked paprika
      • 1 tsp garlic powder
      • Drizzle of olive oil to help it stick
      • Time: 2–4 hours. Venison doesn’t need much.

    I sometimes use Hi Mountain Jerky seasoning when I’m tired. The original blend tastes close to my pepper mix. Handy on busy weeks.


    How long I dry it

    • Dehydrator at 160°F: most beef runs 4–5.5 hours for 1/8–1/4 inch slices.
    • Oven on the lowest setting: door cracked with a wooden spoon; usually 3.5–5 hours.
    • Smoker: 170–180°F for 2–3 hours for smoke, then finish in the oven or dehydrator so it doesn’t get too hard outside.

    I use the bend test. It should bend and crack a little but not snap. If it snaps like a cracker, you went too far.

    When the dehydrator hums away for hours, I need something to keep me entertained (besides staring at trays). If I’m not jotting tasting notes, I’ll sometimes hop into a flirty local chat on SextLocal where you can meet nearby people for no-pressure conversation, spice up the wait, and maybe even swap snack ideas—turning downtime into a fun little social break. Some days, though, I’m more in scroll-mode than chat-mode, so I’ll browse the updated Backpage-style listings over at Backpage Broken Arrow to quickly see who’s up for a coffee run or impromptu jerky tasting nearby, giving me an easy way to turn dehydrator wait time into spontaneous offline connection.


    Small tips that made a big difference

    • Trim the fat. It goes rancid faster and makes
  • Cecina Meat: A First-Person Taste Test

    Note: This is a fictional first-person review for storytelling and clarity.

    So… what is cecina, really?

    Cecina is thin, salty beef. Sometimes pork or goat. There are two big styles I keep going back to:

    • Mexico: raw, salted sheets of beef (plain or with chile). You cook it fast, like a flash.
    • Spain: cured, smoked beef (Cecina de León). You eat it like ham.

    Two names. Two moods. Same core idea—lean, bold, and salty.

    If you’re curious about how cecina stacks up against other cured cuts, take a quick look at the guides on Hats of Meat for some tasty context. There’s even a dedicated write-up that walks through every smoky bite I took during my original first-person taste test if you want all the gritty details.

    My first bite, and then many more

    You know what? Cecina sneaks up on you. It looks simple. It cooks fast. Then the flavor hits—smoke, salt, a little tang. I went from curious to hooked in, oh, one pan session.

    Let me explain how it went in my kitchen.

    Test 1: Skillet tacos (Mexican cecina)

    I got thin cecina de res from a small carnicería. The slices were about as thick as a few coins.

    • Pan: 10-inch cast iron, smoking hot
    • Oil: a light wipe, just a film
    • Time: 45 to 60 seconds per side
    • Rest: 2 minutes

    I sliced across the grain and tucked it into warm corn tortillas. A spoon of salsa verde. A squeeze of lime. Some diced white onion. Done.

    Taste? Crisp at the edges, juicy inside. Big salt. Big beef. The sear gave that brown crust that makes you nod and go, yep.

    I did mess up a piece on purpose. I cooked it 2 minutes per side. It turned tough and cranky. Lesson learned: hot and fast wins.

    One trick helped with salt. I rinsed a slice under cool water. Patted it dry. The flavor stayed. The salt calmed down. If you’re salt shy, that move works.

    Test 2: Air fryer tryout

    • Temp: 400°F
    • Time: 4 minutes

    Edges crisped up, but the center went dry. Not bad, but not my pick. The pan still rules here. The grill too.

    Test 3: Quick grill, big char

    I fired up a small charcoal grill. Direct heat. One minute per side. A brush of oil so it wouldn’t stick. That kiss of smoke? Perfect. Tossed it with warm tortillas and a chunky pico. Backyard joy in five minutes.

    Test 4: Breakfast fix—cecina con huevos

    I diced leftover cecina and tossed it in a hot pan. Added two beaten eggs. A pinch of pepper. A spoon of canned salsa. It tasted like a diner plate and a ranch breakfast shook hands. Salty, savory, fast.

    Spanish cecina: snack plate mood

    I grabbed a pack of thin-sliced Spanish cecina (Cecina de León). Dark, glossy, and smoky-sweet. Those deep mahogany edges come from the long cure and controlled drying—a process not too different from the steaks I babysat during a year living with a dry-ager meat fridge. If you want the full backstory on how this Denominación de Origen protects the tradition, the Consejo Regulador’s site offers a quick primer: Cecina de León.

    I served it like this:

    • A drizzle of olive oil
    • A crack of black pepper
    • A few slices of Manchego
    • Warm bread on the side

    You don’t cook this one. You let it melt a little on your tongue. It’s like beef prosciutto, but moodier. I loved it with a simple salad and a glass of red. It is pricey, though. Small pack, big cost.

    What I loved

    • Flavor shows up fast: salty, smoky, beefy
    • Speed: dinner in ten minutes, easy
    • Range: tacos, breakfast, snack boards, salads
    • Texture: crisp edges when seared right

    What bugged me

    • Salt can spike—some brands are very salty
    • Overcook by a hair, and it turns tough
    • Spanish cecina costs a lot for a small pack
    • Pre-packed slices can taste flat if too lean

    Push the cook time even 30 seconds too long and the slices stiffen into leather—at that point you might as well be making jerky, and if that path interests you I already tested a bunch of meats for jerky to see which ones chew right.

    Buying tips that actually help

    • For Mexican cecina:

      • Ask for thin slices. Even thickness matters.
      • Plain salt or adobada (with chile) both work. Plain is easier to pair.
      • Look for bright red meat with a clean smell.
      • Store chilled. Cook within 2 days or freeze.
    • For Spanish cecina:

      • Look for Cecina de León on the label.
      • Deep brown-red color is a good sign.
      • Fat lines mean better feel in the mouth.
      • Serve at room temp so it softens.
      • Some brands have gone global—this profile of Cecinas Nieto shows just how far the beef can travel.

    How I cook it, step by step

    • Skillet (Mexican cecina):
      • Heat pan until it just smokes.
      • Light oil, lay in one slice flat.
      • 45–60 seconds per side.
      • Rest 2 minutes. Slice across the grain.
    • Grill:
      • Hot grate. Brush meat with oil.
      • 45–60 seconds per side.
      • Rest, slice, squeeze of lime.
    • Spanish cecina:
      • No heat. Plate it.
      • A little olive oil, pepper, done.

    Easy pairing ideas

    • Corn tortillas, salsa verde, onion, lime
    • Charred scallions and a cold beer
    • Eggs and potatoes for breakfast
    • Spanish cecina with cheese and bread
    • Toss on a salad with cherry tomatoes and a light vinaigrette

    Who will like it (and who won’t)

    • Love big flavor and fast cooking? You’ll be happy.
    • Watching salt or hate chewy cuts? Maybe pass, or go light and rinse first.
    • Want a fancy snack board? Spanish cecina shines, if the price doesn’t sting.

    Final take

    Cecina is simple food with loud flavor. Treat it with heat and care, and it pays you back fast. Keep a pack on hand, and dinner stops being a puzzle. Just don’t walk away from the pan. It cooks fast—blink and you missed it. Speaking of quick hits of satisfaction, if you like the idea of fast results in your leisure time as much as you do in the kitchen, take a look at this straightforward Meet N Fuck review—it breaks down the game’s steamy scenarios, pricing, and user tips so you can decide whether it’s the right kind of after-dinner entertainment.

    Maybe you’re packing up a cooler of cecina for a road trip that swings through West Virginia, and you figure the night shouldn’t end when the grill fades. If the urge for a little human connection kicks in, the city’s local classified scene at Backpage Wheeling lists nearby personal ads, pricing details, and safety guidelines so you can line up some company without derailing tomorrow’s breakfast taco plans.

  • Cachete Meat: The Cut That Turned My Taco Night Around

    I used to skip cachete on menus. Cheek meat? For real? Then I tried one taco from a little truck by the car wash near my place. One bite. Soft, rich, and a little sweet. I went back for two more. Now I keep a pack in my freezer like it’s milk or eggs.

    What you’re actually eating

    Cachete is cheek meat. I use beef cheeks most of the time. It comes from a hard-working part of the cow, so it needs low heat and time. When it’s done right, it goes silky and tender. Not mushy. Just… perfect taco meat.

    Does the name throw you? It did for me. But the taste sells it fast. For my full blow-by-blow on how this cut won me over, the team at Hats of Meat put my story up here.
    Need a visual crash course on where cheek sits on the steer and why it behaves the way it does in the pot? Peek at the diagrams over on Hats of Meat and you’ll feel like a pro at the butcher counter.

    Where I bought mine (and what it looked like)

    I picked up 3 pounds at my local carnicería in Santa Ana. The butcher called out, “For barbacoa?” and smiled. That’s a good sign. The pieces looked a little wild—some silver skin, some fat, and thick chunks. Not pretty. Also not fancy steak prices, but not dirt cheap either. Fair.

    I trimmed the thick silver skin for about 10 minutes. I left some fat. That fat pays you back later.

    How I cooked it at home

    I’ve made cachete three ways. Two were great. One was… fine.

    Low and slow barbacoa (slow cooker)

    • I salt and pepper the meat.
    • I blend 4 guajillo chiles (soaked), 2 chipotle peppers in adobo (La Costeña), half an onion, 4 garlic cloves, a splash of apple cider vinegar, cumin, oregano, and a cup of beef broth.
    • Everything goes in my Crock-Pot on low for 8 hours with 2 bay leaves.

    It shreds with a spoon. I warm Mission yellow corn tortillas, add onion, cilantro, and a squeeze of lime. My son called it “beef butter.” He’s not wrong.

    Faster, still tender (Instant Pot)

    • Same sauce as above.
    • I sear the meat on Sauté in my 6-quart Instant Pot Duo, add sauce, seal, and cook for 60 minutes. Natural release for 15.

    After shredding, I crisp the edges in a hot pan with a little of the broth. Tacos dorados de cachete? Oh yes.

    The one that was just okay (oven braise)

    I tried my Lodge Dutch oven at 300°F for 3 hours. It worked, but the texture wasn’t as lush. The slow cooker and Instant Pot gave me better results with less fuss. If you’re curious about how chefs coax restaurant-level silkiness from this cut, check out this detailed braised beef cheek recipe for extra guidance.

    Taste and texture, plain talk

    The flavor is deep beef. Like short rib, but cleaner. The texture is silky, thanks to collagen (that’s the stuff that melts and makes it feel rich). It’s not livery. It’s not gamey. It tastes like comfort.

    One note though: while it cooks, the house smells very beefy. My partner asked, “Did you boil a shoe?” Rude. But kind of funny. The smell calms down once you shred and season.

    Real meals I made with it

    • Tacos with onion, cilantro, lime, and a few pickled jalapeños
    • Quesadillas with Oaxaca cheese, then dipped in the cooking broth
    • Breakfast hash with potatoes and a fried egg on top
    • A bowl of ramen with a spoon of the broth and a few chunks of cheek (don’t tell my mom, but it slaps)
    • Thinking about something leaner and smoky instead? My first-person take on cecina lives here.

    What I loved

    • Tender every time with low heat and time
    • Takes spice well: guajillo, chipotle, or even just garlic and salt
    • Makes a lot; leftovers freeze great
    • Cheaper party meat than brisket, but just as special

    What bugged me

    • Trimming can be messy; ask your butcher to help
    • There’s the odd chewy bit—pull those out as you shred
    • Strong smell while cooking
    • It needs hours; you can’t rush cheek

    A few small tips that helped

    • Salt early, even the night before. It sits better.
    • Soak dried chiles till bendy. No shortcuts there.
    • Skim extra fat from the broth. Save a little for crisping tacos.
    • Warm tortillas right on a dry pan till they puff. Don’t skip this. Your tacos will thank you.
    • If your batch tastes flat, add lime and a pinch more salt. Bright + salty = happy.
    • Bonus: If you end up with extra scraps and wonder which cuts dehydrate best, I ran a jerky trial you can read here.

    Who should try cachete

    • You love barbacoa, birria, or short rib vibes
    • You meal prep and want meat that reheats well
    • You host game day and want a build-your-own taco bar

    If the name turns you off, call it barbacoa. Then eat it and smile.

    Planning to turn taco night into an even more unforgettable evening? If you’re whipping up silky cachete and hoping to find someone nearby who’s just as excited about good food and laid-back vibes, swing by MeetnFuck—it’s a quick, free way to connect with local singles who are down to share a plate (or whatever the night brings).

    If SoCal’s a flight away and you’re plotting your cheek-taco feast somewhere around Massachusetts instead, you can still line up great company by scrolling the local personals at Backpage Quincy—the listings refresh constantly with Quincy singles looking for casual meet-ups, so you can pair your tender cachete with fresh conversation and maybe a second round of tacos.

    My verdict

    I give cachete meat a solid 4.5 out of 5. It’s not weeknight fast, but when I want a win? This cut shows up big. Even on rainy Sundays. Even when the game goes to overtime. It’s comfort food that feels like a hug.

    You know what? I used to chase fancy steaks. Now I plan taco night around cheek. Go slow. Be kind to your tortillas. And don’t fear the name.

    —Kayla Sox

  • I Cooked Squirrel Meat So You Don’t Have To (But Maybe You Should)

    Quick map:

    • Why I tried it
    • What it tastes like
    • Real meals I cooked
    • What I loved
    • What bugged me
    • Tips that actually helped
    • Who should try it
    • Final bite

    So… why squirrel?

    Short story? Curiosity and family. My uncle in West Virginia grew up on it. He still calls it “tree chicken,” which made me laugh, then think, then cook. I first tasted it at a church supper outside Charleston. Warm stew. Paper bowls. A lady in a green apron said, “Sweetie, take a biscuit.” I did. That early bite sent me down a rabbit—er, squirrel—hole, and I ended up turning the whole adventure into an extended kitchen journal if you want the blow-by-blow version.

    Later, I bought two skinned squirrels from a small wild game shop near Pittsburgh. Not a chain. The kind with handwritten labels and a bell over the door. I cooked them at home twice—once fried, once in my pressure cooker. Odd choice for a Tuesday night? Maybe. But it felt right in fall, when the air gets that crisp snap.

    What does it taste like?

    Think dark meat chicken, but leaner. A little nutty. A little woodsy. Not weird, not gross—just… rustic. The legs are firm. The back has more tender bits. If you cook it too fast, it goes tough and stringy, like overdone turkey. If you take your time, it turns silky and rich.

    I won’t lie. It’s bony. Tiny bones hide everywhere. You learn to take small bites and chew slow. I did, and I lived to type this.

    Three real meals I made (and ate)

    1. Cast-Iron Fried Squirrel with White Gravy
      I soaked the pieces in buttermilk and hot sauce overnight. Pat dry. Salt, pepper, flour. A little paprika for color. Into hot oil in a heavy pan. The crust went deep gold, crisp but not loud-crunchy. I made pan gravy with the drippings and a splash of milk. Served with mashed potatoes and green beans. Tasted like country fair food, minus the noise.

    2. Pressure Cooker Squirrel Tacos
      I browned the pieces, then cooked them under pressure for about 25 minutes with onion, garlic, cumin, and a splash of apple cider vinegar. After a quick rest, the meat pulled right off the bone. Soft tortillas, pickled red onion, lime, cilantro. My son asked, “Is this chicken?” I shrugged and said, “Close.” He ate two. Victory.

    3. Brunswick-Style Stew at a Church Supper
      Tomatoes, corn, lima beans, and squirrel meat that had simmered for hours. It had a gentle smoke note, maybe from the pot. People stood in line and swapped stories. I added hot sauce and crumbled a biscuit on top. It tasted like cool weather and kind neighbors. If you’re curious, Brunswick stew is a traditional Southern dish that originally incorporated small game meats like squirrel or rabbit. Today, it often features chicken but maintains its rich, tomato-based flavor profile with vegetables such as lima beans, corn, and okra.

    What I loved

    If you’re gearing up for an all-day hunt or just need some pep to power through hours of slow simmering, consider grabbing a can of Just Bang—their zero-sugar, high-caffeine blends can keep you alert during the pre-dawn woods trek and still fit neatly into the lean-protein, low-calorie lifestyle that wild-game cooks appreciate.

    What bugged me

    • Bones. Many, tiny, sneaky bones. You must pick through it.
    • Can go tough. Rush it, and you’ll regret it.
    • Hard to find. I had to call around. When I did find it, it wasn’t cheap.
    • Some folks won’t touch it. You’ll hear jokes. That gets old.

    One bright spot: if your local butcher draws a blank, specialty online purveyors like Hats of Meat occasionally stock responsibly sourced squirrel and will ship it straight to your door.
    If you’re down in Georgia, you can also poke around local classified boards in towns like Newnan—plenty of sportsmen trade extra harvest or swap cooking tips there on platforms such as Backpage Newnan, and it’s a quick way to scan current postings and maybe score a few fresh squirrels without making fifty phone calls.

    Tips that actually helped me

    • Soak it. Buttermilk or a salt brine overnight. The meat chills out.
    • Brown first. Color adds flavor. Don’t skip that part.
    • Cook it low and slow. Or use a pressure cooker. Either way, be patient.
    • Aim for safe temp. I cook small game to at least 165°F.
    • Pick the meat. For kids, pull it off the bone before serving.
    • If it’s hunted, use non-lead ammo and trim away any damaged meat. Safety first.
    • Add a little acid at the end. Lemon juice or vinegar wakes it up.

    Who should try it?

    • You like rabbit, duck legs, or oxtail? You’ll probably like squirrel.
    • You love a slow weekend pot and the smell of onions and thyme? Yes, you.
    • Curious about other wild flavors like moose? I cooked moose meat for a week and found the learning curve similar.
    • If you hate bones, hate waiting, or want boneless skinless everything—maybe skip.

    Little side notes I didn’t expect

    Hot sauce loves squirrel. So do biscuits. Also, it’s great on a cold Sunday with a game on and the windows cracked. I wore a sweater. The pot clicked. The dog napped. Simple felt good.

    Final bite

    Squirrel meat surprised me. It’s humble but bold. A bit fussy with the bones, sure, yet worth the fuss when you cook it right. For me, it’s a solid 4 out of 5. I’ll make it again in stew or tacos, most likely in fall, when the sky goes early gray and supper wants to be warm.

    You know what? It tasted like a story I’d heard my whole life—and now I’ve got my own.

  • I Tried Jumbo Lump Crab Meat All Week. Here’s What Actually Worked.

    I’m Kayla, and I cook a lot. I grew up on the coast, so crab hits me right in the feelings. Jumbo lump is the fancy stuff. Big, firm pieces. Sweet bite. Not stringy. I wanted to see if it’s worth the price, or if it’s just hype.
    If you want to peek at the full diary of that seven-day jumbo lump adventure, I documented every bite right here.

    So I ran a little home test. I bought two kinds:

    You know what? Both were good. But not the same.

    Taste and Texture: Sweet, Clean, Big

    The fresh Maryland one tasted bright. Like clean sea air. The chunks were huge—white and shiny, almost like pearls. Very few shells. I ate some cold with lemon and it made me quiet for a second. That good.

    The canned pasteurized one was still sweet, but a touch briny. Not fishy. The lumps were big, just a bit softer. I did find two tiny shell bits in the whole can. Not bad.

    Here’s the thing: jumbo lump is all about the chunk. If you mix it too hard, you ruin it. So be gentle.

    My Real Kitchen Tests

    I cooked with both. I kept the recipes simple so the crab could talk.

    1) Weeknight Crab Cakes (Cast Iron, No Fuss)

    I used the pasteurized Phillips for this. I drained it, then patted it dry with paper towels. In a bowl, I added:

    • 1 egg
    • 2 tablespoons Duke’s mayo
    • 1 teaspoon Dijon
    • 1 teaspoon Worcestershire
    • A squeeze of lemon
    • Pinch of Old Bay
    • A handful of crushed saltines (not many)
    • Crab, folded in very soft, like a hug

    I shaped five thick cakes. Chilled them for 20 minutes. Pan-seared in a little butter and oil in my cast iron. They browned fast, crisp edges, soft middle. Big pops of crab in every bite. I served them with a quick lemon-mayo. My son, who swears he “doesn’t eat sea stuff,” ate two. I did catch one more tiny shell. I flicked it out. No drama.

    Result: Held together well. Big, bouncy bites. Perfect for a Tuesday night.

    2) Fancy Crab Rolls (Brioche + Warm Butter)

    For this, I used the fresh Maryland jumbo lump. I warmed the crab very gently in a pan with butter—low heat, barely a whisper. I tossed with a pinch of salt, squeeze of lemon, and a sprinkle of chives. Toasted brioche split-top buns in butter (I know, I know). Piled the crab on top, then a thin line of mayo. That’s it.

    First bite was sweet, rich, and soft. Like summer on a dock. I almost cried. Almost.

    Result: Worth the splurge when you want a win. Keep it simple.

    3) Easy Garlic Butter Crab Pasta

    Half a pound of pasteurized crab. Spaghetti. Butter, olive oil, sliced garlic, red pepper flakes, and a splash of pasta water. Tossed it all, then added the crab at the end so it wouldn’t break. A handful of parsley. Lemon zest. I finished with a few crumbs of toasted panko for crunch.

    The lumps held up. The sauce hugged the noodles. Not heavy. Not greasy. I ate a bowl standing at the counter, which is a bad habit and also a compliment.

    Result: Great way to stretch the crab for a family.

    Side note: When I’m craving something chewy instead of delicate, I geek out on jerky experiments—this HatsofMeat guide to which meats actually chew right saved me from wasting a lot of steak.

    Bonus: Game Day Hot Crab Dip

    Cream cheese, a spoon of sour cream, Old Bay, a little cheddar, and folded-in jumbo lump. Baked till bubbly. I kept big chunks on top so you could see them. I served it with club crackers and celery sticks. It vanished before halftime. I saw someone scrape the dish with a cracker. I said nothing. Same.

    How To Buy Without Regrets

    • Smell: it should smell clean, like the ocean, not strong.
    • Look: big white pieces, not mushy. A little liquid is fine.
    • Label: pasteurized cans last longer in the fridge (sealed), but use fast once opened. Fresh needs to be used within a day or two.
    • Country: I’ve had good crab from the U.S., Indonesia, and Vietnam. Fresh local can taste brighter, but it costs more.

    Tip: Drain and gently pat dry before cooking. Wet crab can make cakes soggy.
    Proper storage matters, too—after living with a dry-ager meat fridge for a year, I realized how much controlled humidity and temperature can protect flavor, whether it’s beef ribeye or delicate seafood.

    What I Loved

    • Big pieces give a fancy feel, even in simple food.
    • Sweet, clean flavor that doesn’t need much.
    • Easy weeknight hero. Cooks in minutes.

    What Bugged Me

    • Price. It’s not cheap.
    • A few tiny shell bits sometimes. Not a deal breaker, but watch for it.
    • If you over-mix, it turns to flakes fast. Then it’s not jumbo anymore.

    Little Tricks That Help

    • Fold, don’t stir. Think clouds, not cement.
    • Keep binders light. Saltines beat heavy breadcrumbs for me.
    • Heat low and slow if you’re warming the meat solo.
    • Finish with lemon and fresh herbs. They brighten the sweetness.
    • Salt last. Some crab has briny notes already.

    Fresh vs. Pasteurized: My Take

    • Fresh: brighter taste, bigger snap, higher price. Great for rolls, salads, and “look at those chunks” moments.
    • Pasteurized: still tasty, more budget-friendly, easier to find. Great for cakes, pasta, and dip.

    I’ll buy fresh when I want to treat myself or company. I keep a pasteurized can for quick dinners. Both have a spot in my fridge.

    Final Call

    Is jumbo lump crab meat worth it? For me, yes. For extra inspiration on how to let premium proteins shine, I’ll sometimes scroll through HatsofMeat, a site that dishes out smart, meat-centric ideas with humor.

    Got nobody to share that buttery crab roll with? Cooking a show-stopper can be even more fun when it doubles as an ice-breaker for meeting someone new. If that sounds like your vibe, take a peek at this roundup of free local sex apps—it compares the top no-cost platforms and highlights which ones make it easiest to match with nearby adults who appreciate good food and spontaneous plans.

    For folks posted up in the northwest Chicago suburbs who’d rather scroll a throwback-style classifieds board than swipe themselves into thumb cramps, bookmark Backpage Palatine—the page refreshes daily with verified listings so you can arrange an easygoing dinner date (crab cakes in tow) minus the modern-app fatigue.

    Not every day, but when I want a meal that feels special with very little work, it’s my secret card. I’ve tried cheaper “lump” and “backfin.” They’re fine for soups. But jumbo lump makes me slow down and smile.

    Next time you see it, get a pound. Make small crab cakes, or warm it in butter and tuck it into toasted buns. Keep it simple. Let the crab shine. And if someone scrapes the serving dish clean with a cracker—well, same.